Tips and Information about making jewelry


With this blog, I hope to share my knowledge, successes, trials and errors, student's work, tips, and information about making jewelry.

Saturday, February 2, 2013

The Low-Down on Forging Sterling Silver Metal Clay

Janet Alexander

Can fired sterling silver metal clay take the brunt of a hammer?

Design Template
Spoon Plank
I made two spoon planks rolling them out eight cards thick, and lightly texturing the handle areas. I fired them per Mitsubishi's instructions in the kiln.


I hammered the first spoon using a steel dapping block, which was too deep to support the metal correctly. I promptly put a hole in it.


With the second spoon, I wanted to use a wood block but didn’t have one the correct size. So, I made one out of a stump of firewood I found laying outside the house.


Firewood
Carved wood
First I traced the bowl area’s outline onto the end of the stump. Then I used a 10mm ball bur and my rotary tool to carve out a shallow area.


I hammered the bowl area with a rounded raising hammer on the carved stump.

After I got it somewhat domed, I annealed the metal.


Time to anneal

Using a dapping tool
I carved the hole in the stump deeper, and since my hammer was too big to fit where I needed it, I used a dapping tool and a rawhide mallet to forge the spoon’s end into the stump.
It worked fine so long as I stopped regularly to anneal the metal before pushing it too far.


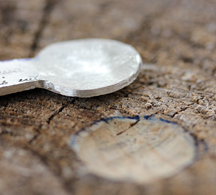
Front side of hammered spoon
Back of hammered spoon
Success! Fired PMC Sterling can be forged and the spoon is ready for refining and finishing.

Wednesday, January 16, 2013

Sterling Silver Metal Clay Reacts with Investment! How to get Around it!

Janet Alexander


I taught a sterling silver metal clay ring class last October and we had some problems with inconsistent shrinkage. Even though the rings were all fired together they all had different shrinkage rates! We made the rings three sizes larger to account for shrinkage, but still some shrunk more than others. We were able to stretch some rings but unable with others.
In a previous test on the sterling sliver metal clay I used an investment plug to keep the ring from shrinking too much but it had a nasty reaction to the investment.   
I tried removing the black by soaking in pickling solution, heating it up with a torch until it was dull red, and finally sanding it. Sanding removed a lot of it but I didn't want to thin the ring shank too much.
I hated the fact that some of my students rings didn't come out as expected. Especially for the guys who couldn't even get the ring on their pinky! So, I thought about it for several days. And the solution it hit me!

I wrapped thick ceramic paper around the plug. Its the same fiber paper used when fusing glass. Yes it does add a little bit of thickness to the plug but not enough to matter. In this instance I bought pre-cut paper from Rio Grande.
I completed the first phase firing with the plug and paper in place.


I then placed all three items together inside a stainless steel screen to keep the carbon from causing pits by getting between the ring shank and the plug.
I fired the piece at 1500F for 1.5 hour. I wanted to get the most shrinkage pressure I could.


The result was nearly no reaction to the paper and the plug held the ring from shrinking too much.  Now keep in mind that if you have a thin shank on the ring the shank could break.

The paper did stick to the ring when I removed it, but that was easily fixed by sanding. Also there was a slight reaction. The metal had a beautiful blue patina to it on one side and on the other side a orange patina! I loved the colors so I kept them. 


Orange patina
Blue patina

Friday, April 27, 2012

Sterling Silver Metal Clay Testing Results with Casting Investment (Ring Plugs)

In September I posted the results from testing the sterling silver clay in August. In this test I found that using an investment plug causes a reaction with the sterling silver clay.

Someone told me that I could place this back into the kiln and fire it again to remove the black.
I did just that and found that it does not go away! I also tried pickleing it in Sparex, it still didn't fade away!
 The only way to remove it is to sand! 

So, fair warning to everyone. Do not use an investment plug to control the ring size. Wrapping it with fiber paper didn't work either.  For the sterling silver metal clay, create the ring three sizes up from the wanted finished size allowing it to shrink down close to the size needed.

Until next time!

Janet Alexander
www.janetalexander.net

Friday, April 20, 2012

Creating Spectacular Faux Stones With Ice Resin

By Janet Alexander


Sometimes I like to make my own creative stones out of resin. Using Ice Resin gives a non-yellowing clear look.

Today I'd like to show how to create faux stones made from Ice Resin.

Supplies Needed:
  • Plastic candy molds (I used square molds)
  • Ice Resin
  • Popsicle sticks
  • Toothpicks
  • Small mixing cups
  • Black eye shadow
  • Silicone mold release agent
  • Stuff to embed into the stone. Ideas include:
  • Copper wire
  • Screen mesh
  • Glass frit (string)
  • Mica
  • Golden flakes (found at hobby store)
  • Copper flakes
  • Spices like parsley, Cilantro, peppers, and the like.


I use candy molds. The don't require using a release agent. Otherwise spray some silicone release agent into the mold.


The faux stone has 3 layers and is built from the top down in the mold.
Make the first clear layer for the top of the stone. This gives the illusion of depth to the stone and keeps the embedded items from poking out of the top.

1.   Mix a small amount of resin per the manufacturer’s instructions.
2.   Pour into the mold until it is 1/3 filled.
     Allow to set 24 hours.
3.   Cover the mold so that dust and debris   cannot accidentally get into the resin.
4.   Make the second (center layer).
  • Decide what embedded item should be seen closest to the top of the stone. Don’t place anything large in this layer as it will block the view of the bottom layer.
  • Place a few small items on this layer.  Here I added gold flake, egg shell, parsley, and black frit to different molds.
5.   Mix a small amount of resin and add to first layer.
6.   Cover the mold and allow the mixture to set 24 hours.
7.   Make the bottom layer. 
  • Adding a few more items to this layer gives the stone depth.
  • Place a few small items on this layer.
  • Adding mica gives it an opal look.
  • Mix a small amount of resin and add to second layer completely filling the mold.
8.   Cover the mold and allow the mixture to set completely per the manufacturer’s instructions.

9.   Remove resin from mold.  Placing it in the freezer makes removal easier. 


Wednesday, March 14, 2012

Combining Sterling Silver Metal Clay with Fine Silver Metal Clay


Hi everyone. I am working on a project that involves making a ring out of two clay types, sterling silver and fine silver. I wanted to know how to combine them without having the problems of uneven shrinkage. Additionally, I wanted to fire them together.


Here is what I made. The shank is made of sterling silver metal clay (PMC Sterling Silver). I hand carved the feather design into it. The top is made from PMC3 metal clay.

To solve the problem of shrinkage I fired them both separately.  The top (PMC3) was  fired at 1110 F for 1 hour. I fired it at a lower temperature to protect the Garnets.
The ring shank is made from PMC Sterling Silver metal clay. I fired it using the two stage system recommended by Mitsubishi.

I used PMC3 syringe and oil slip to hold them together.  I had several questions about this configuarion.


  • Do I fire it using the two stage system or do I fire it using the PMC3 system. 
  • If I fired it using the PMC3 system, would it be a good join?
  • Will the sterling oxidize and not stick to the newly added clay holding them together. 
  • Or, if I fire using the two stage system, I must lower the temperature to 1110 F so as not to harm the stones.
Well my lazy side won out. I fired it on a kiln shelf at 1110 F with no carbon for 2 hours giving the new clay time to connect to the fired clay.

IT WORKED!


Monday, March 5, 2012

OPPS Watch out! Tips about Firing Sterling Silver Metal Clay with Stones!


I have an update about the last blog where I fired the sterling silver ring inside the fiber blanket.

What I have found is that the fiber blanket fumed brown soot on all my stones! Notice the brown in the fiber blanket around the ring.
It washes off the tops of the stone, but it is on the under-side of the stones too! This makes them look dull and hazy!
I fired the ring again, this time buried in the charcoal and only went up to 1400F. It did help burn off the soot but a lot of it is still there under the stones making them dull.

I will try putting it into an ultra sonic cleaner and then steam blasting them to see it that cleans it off the back of the stones.

Thursday, March 1, 2012

Think about Shrinkage when Designing Sterling Silver Metal Clay Hollow Ring!


Hi everyone, I have continued to work with the new sterling silver metal clay trying to solve the problems I had from my last posting. Success!

I recreated the ring in my last post, but this time I made sure that the inside ring shank was not attached to the outside ring band. I also made both inside and outside ring bands the same thickness, 6 cards thick.

In my first attempt, I made the inside ring shank thinner, thinking that the sterling silver clay is stronger and it didn't need to be so thick. Which is true, but it also shrinks quite a bit!  So, while firing, the outside larger band pulled the thinner band apart creating a small tear in the inside ring shank.

Here is the new ring showing the two bands separate and the same thickness. I made them thicker so that I could carve into the clay and set stones later.


Another problem I had with the first ring was the carbon indenting the metal during firing. This time I encased the ring with fiber blanket during the second firing.


First I fired the clay on the shelf (per the instructions) and then wrapped the ring inside fiber blanket with a small amount of fiber blanket inside the ring shank.
 I made sure the carbon below the fiber blanket was 1/2" thick (per the instructions).


I then covered over the fiber blanket 1/2" with activated coconut carbon. The lid was placed tightly on the stainless steel container and fired at 1500 F for one hour. I fired it for an hour because the ring is so thick in mass.


The ring came out fine fully sintered with no dents from the carbon!