Tips and Information about making jewelry


With this blog, I hope to share my knowledge, successes, trials and errors, student's work, tips, and information about making jewelry.

Monday, October 7, 2013

Testing Soldering Fired Sterling Siver Metal Clay


In this test I focused on soldering. I explored the following questions over a series of tests:

  1. Does the porosity of the clay cause problems with soldering?
  2. Do I need to burnish the clay first before soldering?
  3. How well does hard, medium, and easy silver solder work with fired    clay?
  4. Does pre-melting solder to the piece change the metal’s malleability? 
  5. After soldering, can I form the metal without the sterling piece coming off or cracking?

I’d like to explain more about question 4, which relates to the changes of the metal. Melting solder onto the metal actually causes the solder to alloy with the metal (this is true with any non ferrous metal). The two metals combine at the molecular level to create a new metal with a different melting point. So, with this question I wanted to know whether the malleability of the new alloy differs from the PMC Sterling.

Test 1


In my first test, I made a two-tone ring with copper and metal clay. The center of the ring is made with fired PMC Sterling silver metal clay and the ring band is made from copper sheet.
 In my first experiment, I created a strip of textured clay 4 cards thick and fired it per the manufactures instructions. I only fired the clay for 30 minutes in the second stage firing at 1500˚F. 


I then pre-melted hard silver solder to the back of the sterling silver piece.

Afterwards, I sweat soldered* the sterling silver piece to the copper.


Once I started bending the copper/sterling silver into a ring, the sterling silver started cracking.


Here are my initials answers to my questions:
  1. Does the porosity of the clay cause problems with soldering? No it does not.
  2. Do I need to burnish the clay first before soldering? No
  3. How well does hard, medium, and easy silver solder work with fired clay? Hard solder worked fine. 
  4. Does pre-melting solder to the piece change the metal’s malleability?  It might, I will perform another test. More on that below.
  5.  After soldering, can I form the metal without the sterling piece coming off or cracking? It doesn't come off but too much bend causes it to crack.
After soldering, can I form the metal without the sterling piece coming off or cracking? In this test, the metal cracked. More below.
*Sweat soldering is the process of melting solder to the back of one piece and then attaching it to another piece by again melting the solder, thus connecting both pieces together.
With the questions of malleability and bending still unanswered, I devised two more tests. 

Test 2

 
I created three PMC Sterling Silver metal clay bands using the same texture but made them 6 cards thick and fired them in the second stage for 2 hours at 1500˚F. I created three variations and bent them into rings with the following results:
  • Band 1- No soldering/plain PMC Sterling band bent into a ring without any problems. 
  • Band 2- I melted hard silver solder onto the band and then bent it into a ring without any problems. 
  • Band 3- I repeated my experiment from Test 1, but wanted to see if making the band thicker and firing it for a longer time would keep it from cracking. I annealed the metal after bending it a little and bent it into an oval ring with few problems. It was only on the final, sharp bend that I experienced any cracks - just two small cracks that I was able to solder with medium silver solder. I also soldered the join successfully using medium silver solder.
Test 3


 I created a two-tone ring top using PMC Sterling and copper. I  domed it, and then soldered a ring band to it using easy silver solder. I used the plain PMC Sterling Silver ring band from Test 2 (Band 1).

The results: Everything soldered fine and the ring top domed without the sterling silver cracking.
My Conclusions
All silver solder types, hard, medium, and easy worked well on the metal with no burnishing required. I'm sure IT silver solder would work fine also.
Overall the sterling silver metal clay held up suitably while bending it into a ring band by itself. Doming and rounded bending of the fired metal clay also worked well. The sharp bending of the sterling attached to the copper was too much stress for it, but was easily fixed by making it thicker, firing it for a longer period of time in the carbon, and by annealing it during the bending process. Additionally, I soldered small cracks before they worsened. Sometimes even sterling silver textured wire can crack under these conditions. All in all, the fired sterling metal clay performed competently.


Sunday, September 29, 2013

Sterling Silver Metal Clay Tutorial - Making Slip & Syringe Clay


With the new sterling silver metal clay, there is a lot to experiment with, and to push its limits to find out what IS its limit. The first thing I wanted to do was make some slip and syringe clay. I am used to working with PMC3 and I like using these two clay forms. Yes, slip can be made easily by taking a wet brush and painting it on the lump clay, but I don’t want to spend my time making slip when I need it now.

This is what you’ll need to make your own container of slip.
Small container with a lid
6mm round ball of lump sterling silver clay
A very small amount of distilled water (start with ½ teaspoon)
A clay shaper, flat or round


Place the lump clay into the container pressing it flat inside the container.


Add a small amount of water.


Mix pressing the clay against the side of the container until it is diluted to a smooth consistency.

Allow it to sit overnight and it will become very smooth.

 
Next is making the syringe sterling silver clay.
You will need:
An empty syringe (used up some from PMC3)
Snake roller
Small amount of Sterling Silver Metal Clay


Using the snake roller, roll the clay into a tube shape so that it can fit into the syringe.

Place the clay into the open end of the syringe, pressing it down into the tube with the plunger.


Keep pressing until all air is out.


Place clean tip on syringe.


While I am working with the clay, I keep my syringe sitting in a small container with a sponge and water. This keeps the tip from drying. I also store my brush there too, keeping it moist.

Tuesday, September 17, 2013

Recap of My Sterling Silver Metal Clay Testing Part 1

I spent a year testing the PMC Sterling Silver metal clay and wanted to post the results on my own blog. So, here is the very first post.


Questions, questions, questions! It seems the more I ask questions and get answers, the more questions I have!
In the next six months I will be testing different aspects of the new PMC Sterling Silver metal clay. This is the first post. I want to explore various methods for firing this clay. There has been a lot of buzz about speeding up firing time, mostly because of classroom constraints. When it takes over 1 1/2 hour to fire the sterling silver clay, it makes it hard to have an afternoon class about this new clay.

Let's start with the recommended firing profile. When and where you have time, this is the way to go. According to Mitsubishi, the recommended firing schedule for PMC Sterling Silver is a two step process. Fire the dry clay in open air on a kiln shelf for 30 minutes at 1000˚F (538˚C) for at least 30 minutes, longer for thick pieces. The second step (after cooling the clay) is to transfer it to a stainless steel container, surround it with ½” of activated carbon (at least ¼” apart) and fire it again at 1500˚F (815C˚) for at least 30 minutes.

I fired some base-line test pieces using the recommended procedure. Phase-1 took 43 minutes. This includes the time for the kiln to heat up to temperature and the 30 minutes of soak time at 1000˚F (538˚C). Phase-2 lasted approximately 51 minutes (not including cool-down time). All my tests using the recommended firing procedure came out perfectly! I was able to dome a disc and bend a link without either of them breaking. With that said if you are working on a special piece and want to make sure it fires properly, use Mitsubishi’s recommended procedure.


With my testing, I wanted to find a quicker way of sintering the sterling silver clay. In my first set of tests, I used a 50g package of PMC Sterling Silver metal clay and created five identical oval pieces with their centers cut out (35mm x 20mm and 4 cards thick). I only changed the process for Phase-1 and tried a variety of methods, shown below. All pieces were fired together in Phase-2 using the recommended procedure. This is what I found.


Test 1- Light the clay on fire
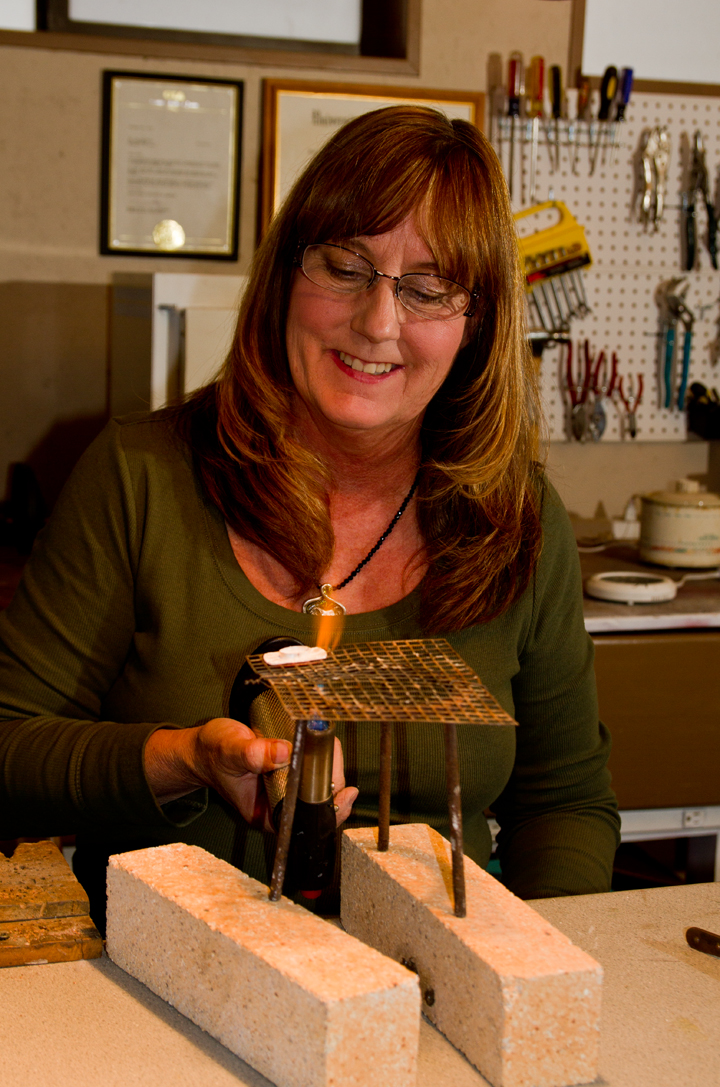
In my personal blog, a reader commented that she used a torch for phase-1 (thanks PPennee), so I tried her technique. I lit the clay on fire with a torch and then pulled it way allowing the clay to burn. If it went out, I re-lit it until it no longer smoked when heated. It’s interesting; while holding the torch on the clay there is no smoke. Only after I remove the torch does the clay burn with a flame and smoke.


The Specs
Weight after complete firing (both phases): 1.6dwt
Measurements after complete firing: 30mm x 18mm
Phase-1 time: 1.5 minutes
Sintered: Yes – bent nearly in half.


Test 2- Hadar’s Method
Hadar Jacobson, who tests and makes base metal clays, designed a faster phase-1 for her clays. She uses a camping stove and a stainless steel bowl with activated carbon in it. She places the unfired dry clay on top of the activated carbon and then covers the bowl with a fiber kiln shelf that has a hole in its center. She fires it until there is no more smoke coming out of the bowl and then places it in the kiln for the second phase firing. In this instance, I used her phase-1 technique and then Mitsubishi’s phase-2 technique.

The Specs
Weight after complete firing (both phases): 1.65dwt
Measurements after complete firing: 29mm x 19mm
Phase-1 time: 10 minutes
Sintered: Yes – bent nearly in half.


Test 3 – Mitsubishi’s Procedure

The recommended procedure.


The Specs

Weight after complete firing (both phases): 1.70dwt
Measurements after complete firing: 29mm x 20mm
Phase-1 time: 40 minutes
Sintered: Yes – bent nearly in half.


Test 4 – Torch for 3 minutes
I heated the piece with a torch for 3 minutes. I heated it to a very dull red, like when annealing metal on a fire brick, allowed it to cool, and then completed the second phase.


The Specs

Weight after complete firing (both phases): 1.85dwt
Measurements after complete firing: 30mm x 19mm
Phase-1 time: 3 minutes
Sintered: Yes – bent part-way but broke sooner than the others.

More Questions
I had more questions after completing these tests. I made four discs 18 mm in diameter and 4 four cards thick.
  1. Does the clay shrink any more with longer firing?
    I fired disc #2 per Mitsubishi's instructions for 30 minutes. I then fired disc#3 per Mitsubishi's instructions for 2 hours in phase-2.
    Answer: both discs were the same size. They both measured 15.5mm after firing.
  2. Is the torch fired (in phase-1) clay less strong than the recommended firing technique?
    Answer: no.
    I re-did the test with disc #4 and successfully domed it. I did however anneal the disc after doming it a small amount and then proceeded to dome it more.
  3. What happens if I only fire the clay on the kiln shelf at 1500˚F (815C˚) for 1 hour?
    Answer: It doesn’t sinter (see Photo#1). The outside layer is metal and polished up to a silver shine with a brass brush but it broke very easily. The inside is dark gray and the outside is silver. I did learn though that it can still be sintered by completing the two phase process.

    Photo #1 left piece is not sintered.
  4. What happens if in phase-1 I fire the clay on the shelf for just 1 minute at 1000˚F (538˚C) and then complete the recommended phase-2 procedure?
    Answer: It doesn’t sinter.
  5. What happens if in phase-1 I fire the clay on the shelf for 10 minutes at 1000˚F (538˚C) and then complete the recommended phase-2 procedure?
    Answer: It sinters fully and is strong enough to be domed.
  6. What happens if I place a disc inside a screen under activated carbon and fire it at 1500˚F (815C˚) for 1 hour? Will the air inside the screen area be enough to allow it to sinter? (See Photo #2.)
    Answer: No, it doesn't sinter (see Photo #3 )


    Photo # 2

    Photo # 3
  7. If I am attaching two fired pieces together using oil slip can I bypass phase-1? If so, at what point does it not sinter?
    Answer
    : It doesn’t sinter when fired at 1500˚F (815C˚) for 30 minutes. I fired three pieces separately and then used sterling silver oil slip putting them together. Additionally, I added syringe clay as a decoration and as reinforcement where the bail and the base connect. At first it looked like it sintered, the new clay shined up, but when I applied force it all fell apart. (see Photo # 4.) I then re-applied more oil slip and syringe clay, and fired it to the Mitsubishi’s recommended firing with phase-2 holding for 2 hours. It fired perfectly and doesn’t come apart with applied force. I will need to test this again with firing the piece for a longer time.
  8. Photo #4


    Conclusion
    If you are working on a prize pieced, take the time and complete it using Mitsubishi’s recommended firing. If you are willing to cut some corners and time, then try some of the above tests. I wanted to make sure the tests were repeatable so I re-tested the pre-firing using the torch and made this pendant from test disc #4 and oval #3. It seems to be working. I can say that in a classroom situation, where time is short, I may use the quick firing using a torch for phase-1 as long as the work is not very large and complicated. I don’t want to risk harming someone else’s piece of art! I will also be sure that students know the recommended firing schedule and the benefits of sticking to it.

    I will continue testing multiple firing to see if longer firing allows the two fired pieces to adhere together without using phase-1 firing.

Wednesday, July 10, 2013

Questions I ask my self while setting up my studio


I recently moved to Alto NM and set up my new studio and thought I’d like to share with you some of the things I thought about while setting it up.
I asked myself some questions and then set it up from there.

First and foremost will I be teaching in my studio or elsewhere?In this case I’ll be teaching in my studio. So I need to look at what my students will need. They will need a workspace. So, my next questions I need to answer is how many students can my studio accommodate and how will I place/make working stations? Where will I sit to demonstrate?


I placed my bench in back of the room facing towards the door (front).
I placed a low table in the center of the room. This table can be used for bead stringing, and working with metal clay. I can place two students here. All in all now, I can fit 5 students in my new studio.  


I installed a counter top along the right side of the room with flex shafts attached as polishing stations and work stations.


Another is along the opposite side with cabinets under it. They hold supplies for classes. I place class supplies on this counter top, depending on what I am teaching that day.


My studio doesn’t have heat, so I put a fake fireplace space heater in the room. I put shelves in to hold merchandise, tools, for sale.


What will I teach?
I will be teaching metal smithing and metal clay classes, so I need to look at storage for tools, books, chemicals, soldering stations, and a place for my kilns. I have a  PMC kiln both that uses regular 110 current which is readily available. I need to store my flammable chemicals in a locked cabinet.


I also installed a fire detector and next to the entry door a fire extinguisher placed at around 4’ off the ground for easy access. Nothing should ever block the fire extinguisher.


The soldering area will be in the far corner where I can open cross windows allowing for venting. Since I am renting this place I cannot install a vent system. This room has windows on three sides and double doors on one. I opened one window above the soldering station  and an opposite window or door on the other side of the room. I have an Oxygen and Acetylene torch, that has its own stand, but my Acetylene air torch does not. It must be attached to the wall with a secure chain to keep it from falling over.

For fire proofing placed some left over granite on top of the counter top and a Solderite board on top of that. Home Depot sells stainless steel sheet that could be placed on the wood counter top and then have the Solderite board on top if it.


Finally, I bought some small safety signs,  Oxygen in use, Flammables, No Smoking, Fire Extinguisher, First Aid kit, and some others. The oxygen and no smoking signs on posted on my front door. Of course the Fire Extinguisher sign is next to the fire extinguisher and the First Aid sign is the same. 


I hope this helps bring to light some simple things to think about when setting up your studio.

Janet


Wednesday, May 15, 2013

Tips on Finishing your Jewelry


Finishing your work is just as important as creating it. It is actually the first thing people look at, on a subconscious level, when buying l a piece of jewelry in a store. Next time you go into a store, watch someone looking at a piece of jewelry. I guarantee, they will pick it up and turn it over looking at the back side too. And, then if they like it they try it on. It’s imperative to learn how to critically look at your work and finish it properly if you want to be a professional jewelry artist.  Stop saying, “I like the organic look.” That’s a cop-out. 

So, how do you learn to look at your work with a critical eye? Try taking a close-up photo of it. The camera never lies! That’s when the mistakes, and unfinished areas really pop out. Next, start using eye magnification so you can see what the camera sees. Finally, when you think you are finished with it put it down, walk away, and then come back another day and look at it with fresh eyes. 

These are some of my personal finishing techniques.

  • If I want a high shine, I hand sand from coarse grit to finer grit using wet/dry sandpaper starting with 320, 400, and then 600 grit. I only sand in one direction (back and forth) with each grit of sandpaper until I only see lines created by that sandpaper. Then I move to the next finer grit, I rotate the piece and sand across the lines created by the last sandpaper until I no longer see those lines.  After finishing with the 600 grit sandpaper, I then I use the Micro Mesh sanding pads. I have one set for unfired clay and one for metal.

  • While hand polishing I look at the reflection of light on the metal. Flexing it from side to side shows all scratches and dents.

  • If I want a fine brushed finish on an area. I still sand away all scratches, dents, and imperfections and then come back with a brushed finish using a satin finish buff. It really makes a difference in how it looks.

  • If I want that unique shine that can only happen by tumbling, I still hand finish removing scratches, dents, and imperfections and then place the object into the tumbler.

  • If I am sanding flat surfaces, I use a sanding stick. I make my own sanding stick by wrapping strips of sandpaper around a tongue depressor.  Then as the paper wears out, I unwrap one side, tear off the paper and sand more.

  • I use cartridge sanding roll to sand the inside of rings making sure any seam lines are wiped out. These are available in coarse to fine grits and screw onto a cartridge roll mandrel.

  • To get into tight areas, I use a steel or brass end brush with a rotary tool.

Sunday, April 21, 2013

Using Mold Pellets for Custom File Handle


Have you ever heard of Multi-Mold Pellets? At first glance the pellets look like rock salt. But, they are actually small plastic pellets that become malleable when heated in hot water (140 -170 degrees F) They can be used to make molds, reverse molds of texture plates, doming forms, and more!


To warm, place a small amount of pellets into a stainless steel strainer and then place in a pan of hot water. When they become clear they are ready to mold.
Pellets in pan of hot water

Pellets are ready to mold

Forming a shape with my fingers
New handle
File with no handle
Here, I formed a handle for my flat file. Once you form your desired shape, allow the plastic to air-cool before using. The plastic turns opaque and hard once cool. If you want to re-use or re-shape, just heat again until clear and re-shape.


 For more tips on using this great product, go to the mold-making section PMC Connection's website.